
Raine’s Guide: What to do if the Dye in a Dress Bleeds
So you washed your new dress, or got splashed with water and the dye ran, and now you don’t know what to do. First of all, DO NOT PUT IT IN THE DRYER.
The most common culprit for bleeding in prints that are other-wise water safe is excess loose dye sitting in the fabric. The good news is that if you have not heat dried or otherwise attempted to set the dye, we should be able to rinse it out of the areas it’s traveled to with a spot of elbow grease, a lot of very cold water, and time.
Disclaimer
Before we go any farther, I want to say that if it’s Baby / AatP and it’s print… especially an older like 2007-2010 era type thing… I suggest asking someone with more experience with Baby / AatP. There are some AatP prints that just… melt when they get wet. And I don’t mess with those. I just don’t. I don’t buy them damaged, I don’t try to wash the ones I have. They go to the dry cleaner.
If it’s a cotton piece printed on fabric by Spoon Flower from before 2013. This guide also doesn’t apply to that. Old spoon flower prints just wash out, and soaking them will only exacerbate that.
I also am not suggesting this for specialty fabrics like velvet, faux fur, silk, etc. This guide is for run of the mill cotton broadcloth or one of the many common polyester fabrics used by Japanese brands and Chinese indie brands. I have not tried this on Korean indie brand items or items from American indie brands who have had custom printing done in the US.
I’ve also had really mixed results with knit (cutsew) items that bled onto the lace on them or that had trim that bled back onto the knit.
I am not responsible if this doesn’t work. I am not responsible if this ruins your dress. I absolutely recommend talking to a laundry / cleaning professional if you are more comfortable doing so.
If the damage is very mild, and there is a waist tie you can use to test this before you dive in to the dress, test on the waist tie, by all means.
Anytime we introduce water to a piece that isn’t marked as water safe or previously had an issue with water, and anytime we introduce a cleaning product, we are taking a risk. This is my method, for my closet, which contains a lot of red, black and navy blue pieces, but every piece is different.
Also, don’t put multiple bleeding pieces together, stick to one garment at a time.
Materials:
- A clean bath tub or large clean plastic bin in a clean bath tub. You can use a large sink like a clean kitchen sink, but it’s easier in a bathtub, IMHO unless you have an actual utility sink. (I use an old clear storage box I had sitting around in my bathtub. This is a bit big, you can go a little smaller)
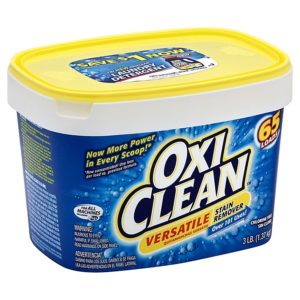
- OxiClean Versatile Stain Remover Powder, or an equivalent bleach-free oxygen based cleaner.
- Shout Color Catcher Sheets, or a local equivalent. These are paper sheets specifically sold to catch dye in the laundry (not fabric softener sheets)

- Copious amounts of very cold water and/or some ice (especially if it’s summer)
- 1-3 large towels (preferably old ones in case the color transfers a tiny bit)
Method
Step 0: Prep
Before we begin, remove any corset lacing ribbon that is removable, check the pockets (I turn them inside out to be sure), remove any removable ribbon bows, detachable chains, detachable brooches that are made of contrast material. Basically anything not made of the same fabric as the dress. Zip up the zipper. Detach the waist ties (but do include them), and I detach the straps. This prevents you from popping off the buttons by mistake if you grab one while it’s soggy and heavy. I also detach pin on bows made of the same fabric, but will wash them with it.
Step 1: Flood the Extra Dye Out
Our first step is going to be to rinse out as much of the loose dye as possible. So we are going to fill our tub with cold, cold water, and put the dress and a couple color catchers in. It may immediately color the water. Swish it a little in the water, but as soon as the water hits a point where it’s more than just the tiny bit tinted, dump it and refill the bucket.
You are probably going to have to do this several times. I have done this six, seven, eight times for some things. But what we want to see happening is the water should start to be lighter with each rinse. When the water runs clear when you rise the dress, then you can stop.
Note: I treat the waist ties with the dress just in case the color shifts slightly, it usually doesn’t but it is possible for there to be a slight change in tone. But if a piece already has bleeding damage, a slight tone shift (like the reds being slightly more cool or warm after, for example), is usually not noticeable and a reasonable trade off for fixing the damage.
Step 2: That’s the Magic of Oxiclean
Oxiclean needs to be activated with hot water to work, however hot water is going to make items that aren’t colorfast bleed more.
On the back of the Oxiclean package, there should be instructions for washing with cold water, but the general gist is this:
- Put a small amount of hot tap water into the bottom of your washing tub
- Add the oxiclean powder
- Stir it around with your fingers until it dissolves (you should probably wear gloves, but I’m a hypocrite who doesn’t)
- Add cold water and ice until it’s cold to the touch. Sometimes I have to add ice to get the temp back down if I’ve added too much hot water. Add enough water that it would cover your dress
- Add the color catcher sheets (note: if they are still a shade of white, you can keep re-using them)
- Add the dress
- Let it sit. If the water gets too tinted, dump it and start over (I know it feels wasteful, but we don’t want to let the dress sit in dye). The oxiclean will make it kind of a milky white, and a garment that isn’t bleeding, just dirty, will typically make the water a dingy brown-gray.
I usually check in at 5 minutes, 10 minutes, 15 minutes, 30 minutes, 1 hour, and 2 hours just to make sure the water isn’t too tinted.
Note: After the first 5 minutes, you can start step 3 if you want.
Now, I have a friend who at this point is done, she lets it sit overnight, and it usually lifts for her. I’m impatient and I have mega anxiety, so I usually don’t stop here. If you want to stop at this point, let it sit overnight and then skip to Step 4 tomorrow.
Step 3: Scrubbing the Pain Points
I respect your choice. Ok, so the next thing we are going to do is try a few different methods for trying to lift the areas that are stained by the bleeding. This is good for a print with small red objects that transferred red to the things next to them, etc.
First, let’s try the oxiclean because we have it on hand. In a small cup, (or like…. the palm of your hand if you are a disaster like me), combine some oxiclean powder and just enough hot water to make a paste. Massage this paste into the areas that have dye transfer. Agitate the fabric a bit, rubbing it against itself. Leave the rest of the garment submerged as you work on this one spot. You can dip it back into the greater tub of oxiclean water to “rinse” it. If it responds well to this, great! Work your way around the garment, but do dump and replenish the water if it becomes too tinted.
If it doesn’t respond super well to this, you can try ivory brand bar soap, or other mild liquid cleaners. Like, honestly, I’ve used clear liquid hand soap and/or cheap suave shampoo. It sounds dumb when I write this out, but if something is “ruined”, I’ll experiment and clear liquid soap and suave shampoo have both worked for me. I also will try like woolite handwashing laundry liquid. I know I’ve mixed Ivory soap and Oxyclean, but I don’t know if I’ve mixed woolite and oxyclean, so maybe do a good rinse between the two. I’ve used a soft toothbrush before, but rubbing the fabric back and forth / against itself seems to work best. In general though you want to make sure you aren’t being too rough and making the fabric “fuzzy” looking or pilled or causing runs.
Always start off more gentle and work your way up.
Step 4: Rinse, Rinse, Rinse your Dress
Hopefully at this point the color transfer has been washed out. If it hasn’t, go back to step 3, or do a fresh batch of oxiclean water and soak longer. I have heard of people doing 3-4 days of soaking with a few water changes for bad color transfer.
Past this point, we are basically done cleaning, so anything left is staying.
Carefully take your waterlogged dress out of the tub, and carefully dump out the water. Refill the tub with cold water and do a preliminary rinse. You can keep rinsing in clear water baths until it doesn’t have that slippery soapy feeling, or you can rinse directly under the tap, whichever you prefer. You just want to rinse the soap out. Be careful that the waist ties don’t try to go down the drain, and that you aren’t holding it by a waist tie or the straps when it’s heavy and wet. Don’t wring it out.
Step 5: Drying
Spread out a towel and lay your dress on it. Put a second towel on top. Pat your dress sandwich gently to remove excess water. Let it sit between the towels a bit. Once some of the excess water is out of it, you can hang it to dry. Keep knits, and heavy dresses made of very delicate fabrics laying flat.
I dry inside, but if you must dry outside, use a shady area.
I’m reluctant to write this, but if you have trim that is bleeding onto a knit/cutsew material and you have gotten 100% of the dye out, put paper towels between the trim and the knit as much as you can and then blow dry that thing with a hot blow-dryer. Just blow-dry the heck out of it, watching it like a hawk. There was an AP cutsew OP that my girlfriend had that was like this and it was… a nightmare.
I sometimes will hit red areas with a warm blow-dryer if I’m not convinced that the dress won’t bleed a little while drying, but seriously, really, only do this if it’s totally cleaned because heat can make stains permanent.
List of Don’ts
- Don’t use Chlorine Bleach on anything that isn’t 100% white. And avoid it as much as possible even on white items, it’s damaging
- No, you can’t paint bleach on to specific spots.
- Don’t try to paint with acrylic paint, fabric paint, etc.
- Don’t try to paint the image back in with fabric dye, it’s not supposed to be used like that it will just become a blob
- Don’t use Rit color remover or other dye removers unless you are dying over the whole piece. These products are made to bleach fabric to prep it for dying and they typically leave you with a beige-y or green-ish base. No, you can’t paint them on to specific areas.
- Don’t try to sun bleach things that are print unless you are actually trying to remove the whole print
- If it’s old AatP like Queen’s Coach, please don’t get it wet.
- Don’t add heat to something that is stained or has dye transfer until after you have resolved the problem. The heat may set the stain.
Other Solutions
If a contrasting, solid panel of fabric has been stained, a seamstress may be able to remove and replace it.
If a print bled, and the bleeding is small spots, depending on the print, you may be able to embellish it to hide the bleeding. This isn’t an idea solution, but for example, tiny cotton lace flowers sewn on as an applique, ribbon embroidery, gemstones (properly attached) are all things that people have embellished pieces with that might be able to hide small bits of damage. Wearing a piece with an apron or sheer over-skirt can sometimes help to hide slight discoloration as well.
Additional Resources: Brand Washing Directory
I have solved all of these problems by only wearing black. Kuro for life lol.
lol, this is a wise option. I have the misfortune of favoring prints, especially red ones….
I wanted to thank you for the guide. I have a black cutsew with white lace that bleed a lot and turned the lace light purple on the first wash, tears ago. With oxiclean equivalent powder, and also sprey (which did some magic), I was able to restore it. The lace is now an acceptable shade of white. Fortunately my washing machine have a rinse program, so I just run it with oxiclean and without oxiclean powder some times. I had at least 5 colour catchers turning grey from it!?
The oxiclean sprey also saved the lace on another JSK, that turned out to have yellowed with years.
So thank you! I wasn’t aware of those cleaning methods and materials, and finding the local equivalent was great.
Thank you!
Have you had success with this method on dresses that are marked as dry clean only? I have a cotton Meta dress from 2010 that has red in the print that bleeds and am interested in trying this!